To prepare for data transfer in Woodwork for Inventor and Autodesk Vault, the following steps have to be taken:
To prepare for data transfer in Woodwork for Inventor and Autodesk Vault, the following steps have to be taken: 1.Length – length of the furniture part. 2.Width – width of the furniture part. 3.Thickness – thickness of the furniture part. 4.Material Code – material code. 5.Color Code – colour code of the material. |
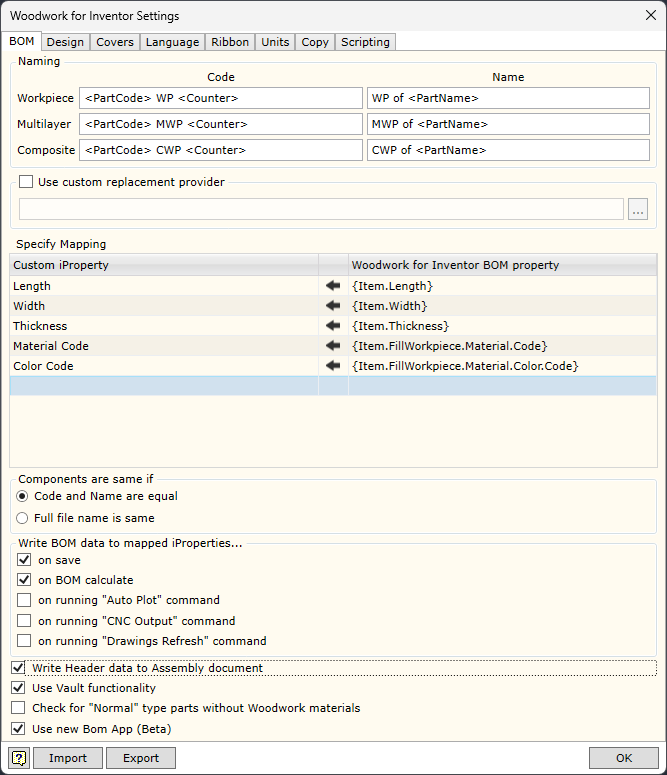
Let’s open any Woodwork for Inventor assembly and configure the default Custom iProperties fields.
Woodwork Design -> Design Settings
We define additional (Custom iProperties) fields for which the values generated by the Woodwork for Inventor BOM generator will be entered. The assignment of values is done by specifying the keywords used in the Woodwork for Inventor BOM generator. For more information on keywords, see here. Before closing the dialogue window, remember to check the “Write BOM data to mapped iProperties on a BOM close” option.
To check that the correct keywords are specified, run the Woodwork for Inventor BOM generator. When the BOM has been calculated, close the BOM generator. When you open any part, you should then see the values entered in the default fields (Custom iProperties). |
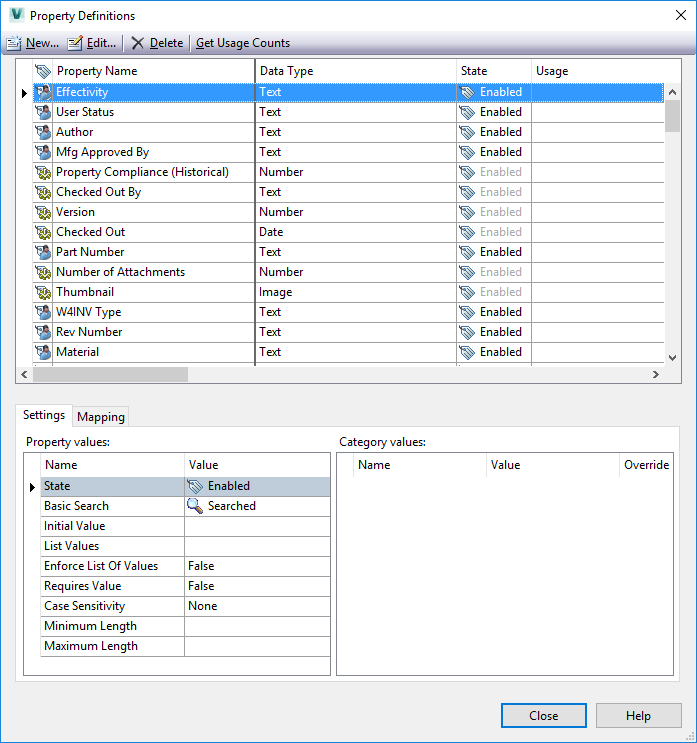
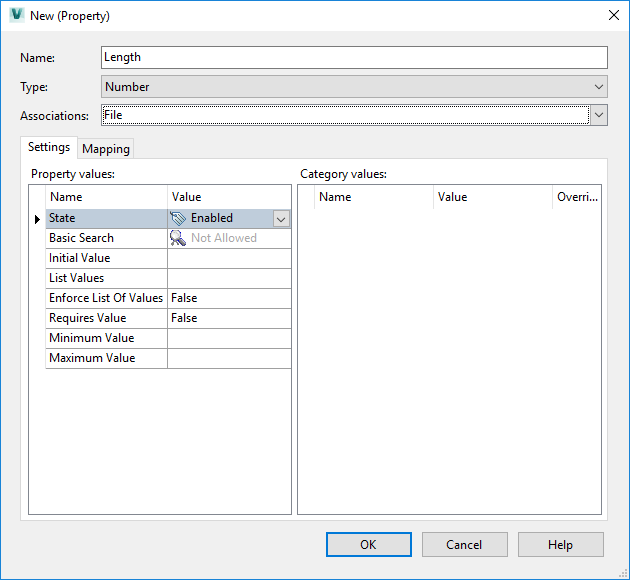
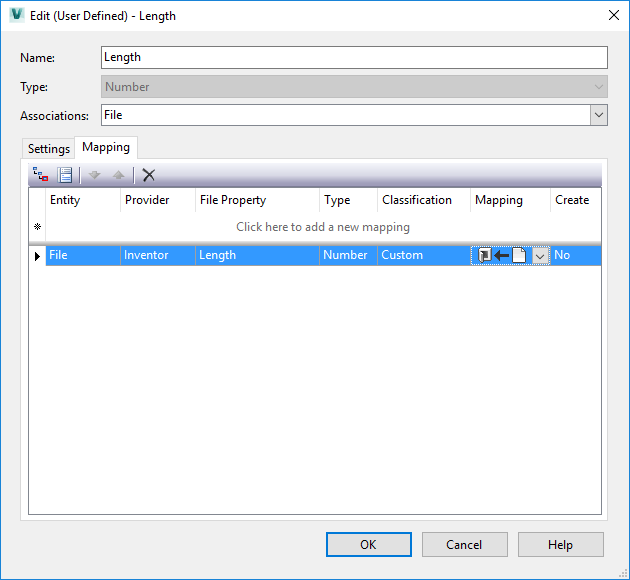
In order to transfer the data from the Custom iProperties field to the corresponding Autodesk Vault data field, you need to perform a mapping. The mapping is done in the same window where the default Autodesk Vault data was created, but switching to the Mapping tab. The mapping can also be done later by editing the description of the additional field.
For a detailed description of how the data mapping between the Autodesk Vault System Properties and the Custom iProperties file is performed, please refer to the Autodesk Vault System Help. In our case, we need to specify that the information provider of the mapping data will be an Autodesk Inventor program file. The value of the specified field (Custom iProperty) should then be read from it. Do not forget to set the data flow direction from the Autodesk Inventor file to the configurable data. |
The system is now ready for work and every time a part is added to Autodesk Vault, the Custom iProperties data from the file will automatically be written to the Autodesk Vault system card meta-data. The user can configure the Autodesk Vault browser window view (View Customisation) and see the desired data on the screen.