The BOMs are designed to perform various informative data cross-sections that allow the analysis of the information generated and further actions. For example, once a product BOM has been generated in the form of a parts only list, it is possible to select only the components to be purchased and to forward the processed list to the purchasing, logistics or warehouse departments, which will then deliver the required components to production
Such data filtering can be done in two ways:
1.in the exported BOM to an external file
or
2.before the BOM export.
BOMapp allows to create individual BOM images, apply filters and perform data manipulations directly in the application window.
Creating a tab
1. To create a new tab, click the "+" sign in the tab bar.

Create a custom tab
2. You then need to specify the BOM type on which the new tab will be based. As mentioned above, there are 3 types: Structured, Parts only list or Material summary. You also need to specify the name of the tab and click the "Create" button.
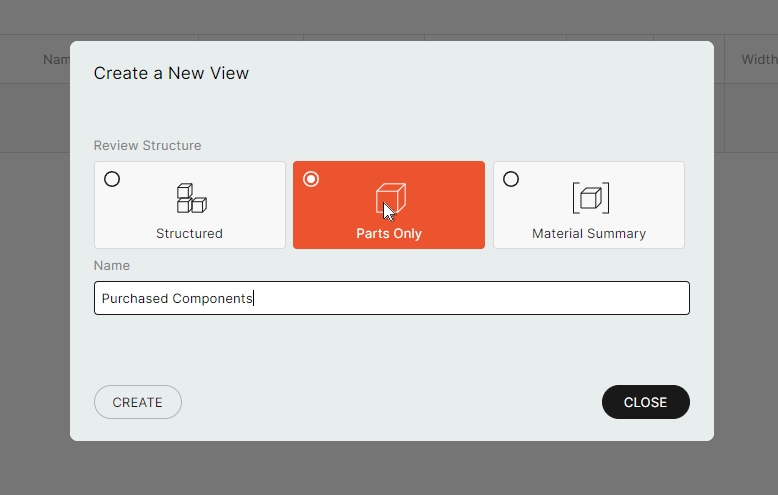
New tab settings
3. A new tab is created.
The resulting tab shows only the base entries with the mandatory Code and Quantity fields. Additional columns need to be added to create a personalised image.
.
For data filtering, the system has a filtering mechanism that allows data filtering based on individual keywords and value conditions. This mechanism is flexible enough to allow several filters to be created and applied, rather than just one.
Example 1:
The first filter selects parts that have an assigned specific material group, say LMDF. The second filter can be used to select from the remaining materials components with a maximum width of 600 mm. In this case, the BOM image on the tab will look like this: all components with LMDF type material and a maximum width of 600 mm are shown.
Example 2:
The first filter selects only those components that are Purchased from the entire list. The second filter can only select components that are from a specific manufacturer. In this way, the tab will only show the components that are purchased and from a specific manufacturer.
At the same time, an additional Type column has been added in the Columns dialogue, using the {Item.Type} keyword.
Initial image before applying filters.
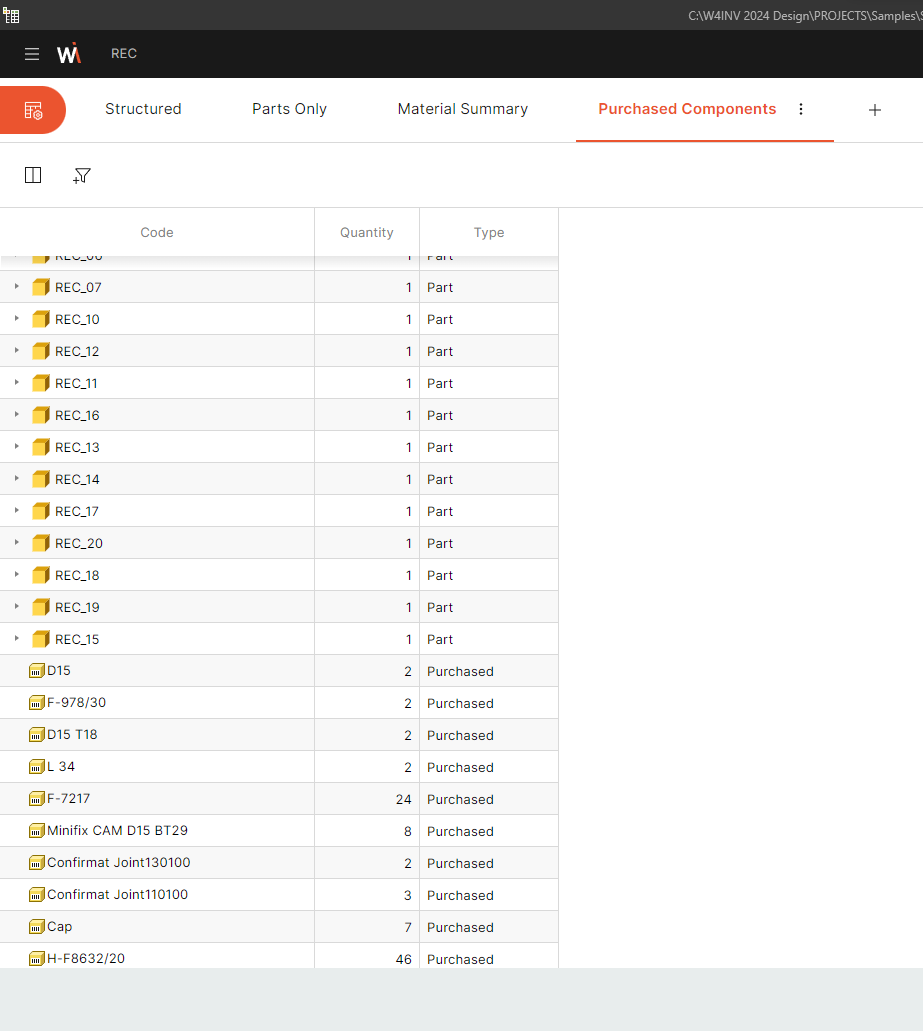
Unfiltered data
1.To create a filter, click on the filter icon.
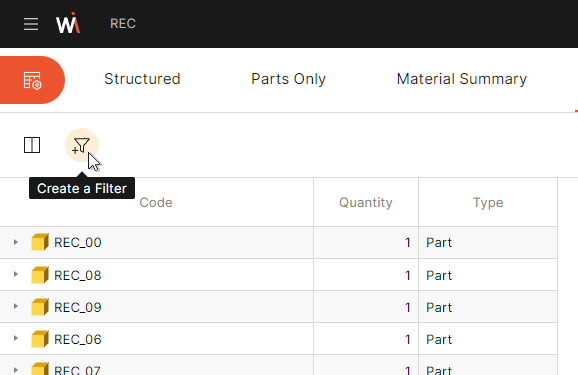
Create a Filter
2. The window below opens.
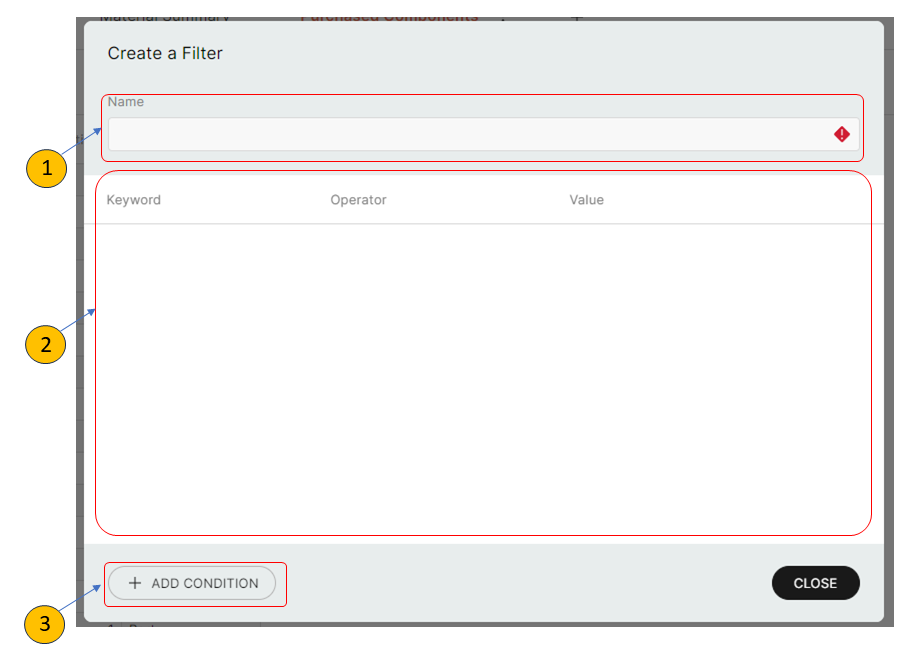
Custom FIlter dialog
The following main sections are visible in the window that opens:
1.Name of the filter to be created.
2.Table of keywords and conditions.
3.Adding new conditions.
So, accordingly, a name is entered and a new condition is added.
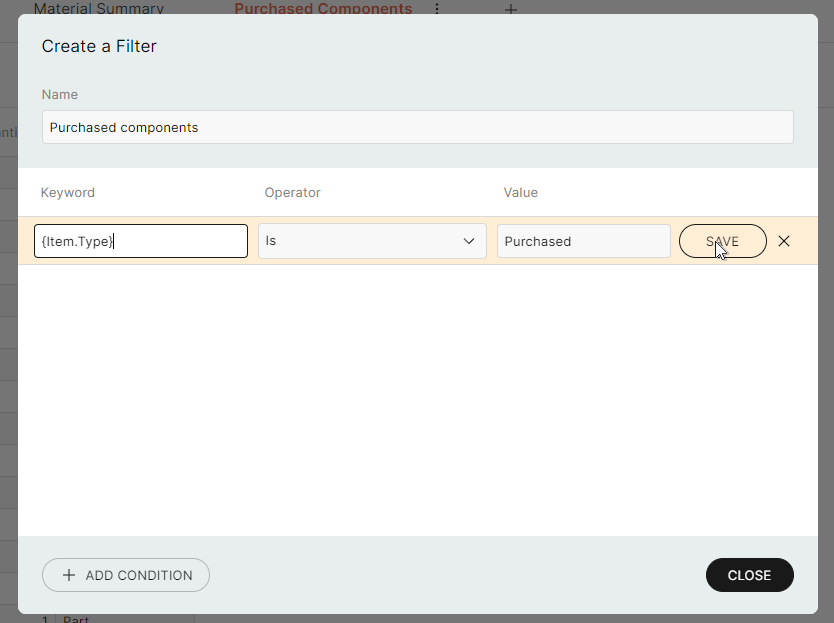
Conditions for a filter
As can be seen from the attached filtering condition, there are 3 variables to specify:
1.Keyword
2.Operator
3.Variable
Operator – a conditional argument that specifies the value or variable to be compared with the value in the keyword.
Variable – a user-defined value by which to filter or compare.
Important!
If there are several conditions in the same filter, they operate with the AND operator. For example, if the same filter contains condition1 AND condition2, the output will be the one that satisfies both conditions. If two or more different filters are created, their conditions are not combined.
Result
After creating and applying the filter, the result shown below is obtained.
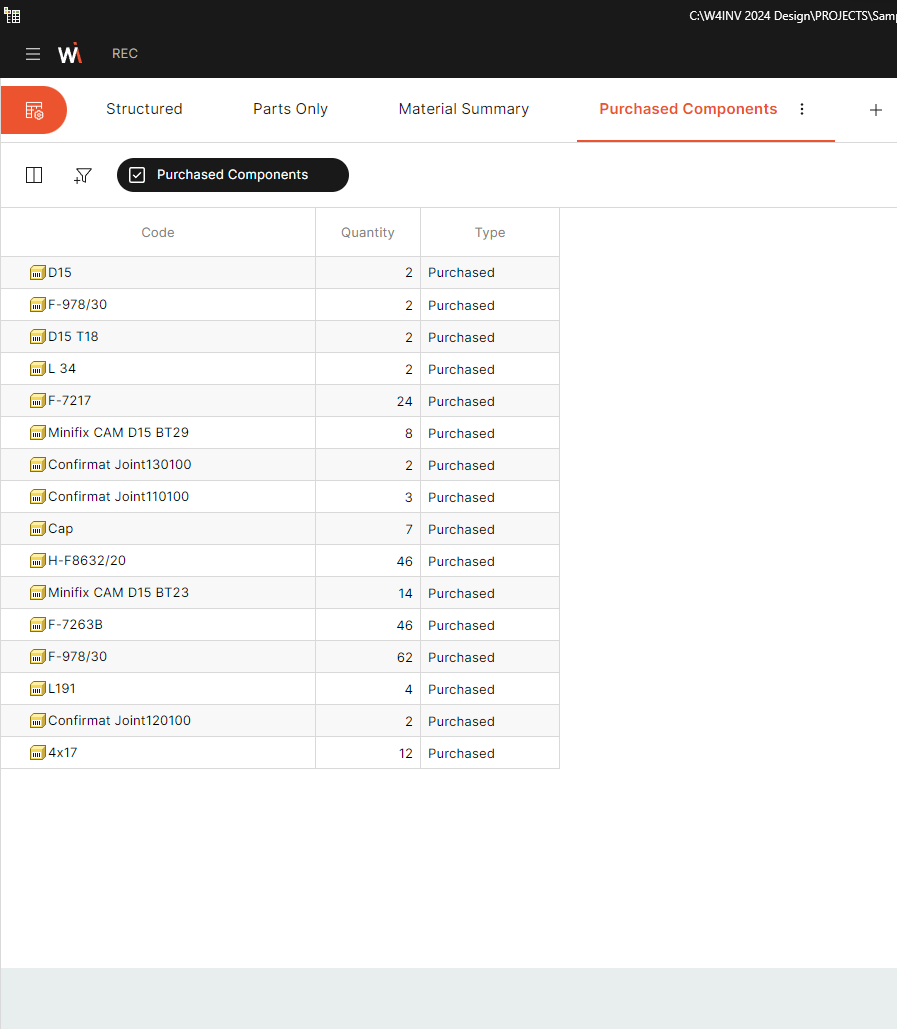
Filltered data
Managing filters
As mentioned earlier, it is possible to create multiple filters, rather than just one, which allow to dynamically change the data you see. So here is an example of how, in the current situation, an additional filter is added to display all Confirmat components.
1.A new additional filter is created with the condition below.
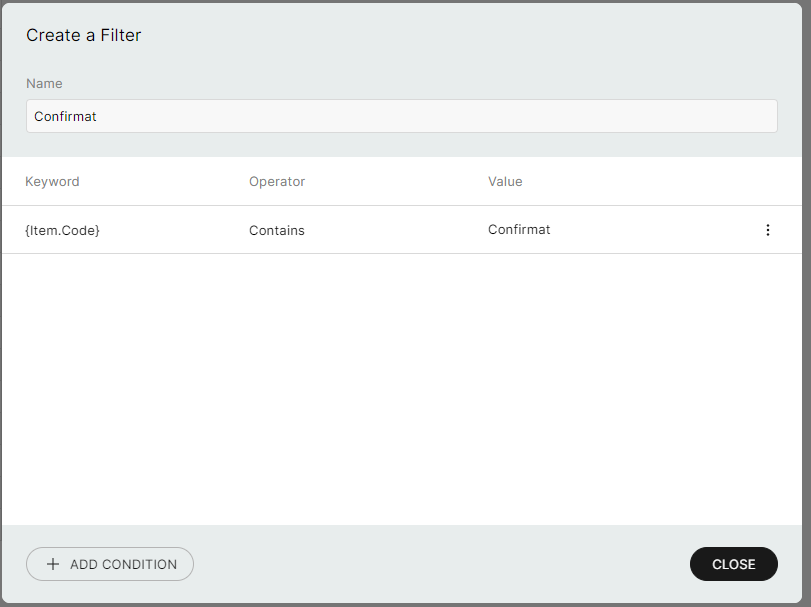
Additional filter
2.Both filters are visible in the tool bar: Purchased Components and Confirmat.
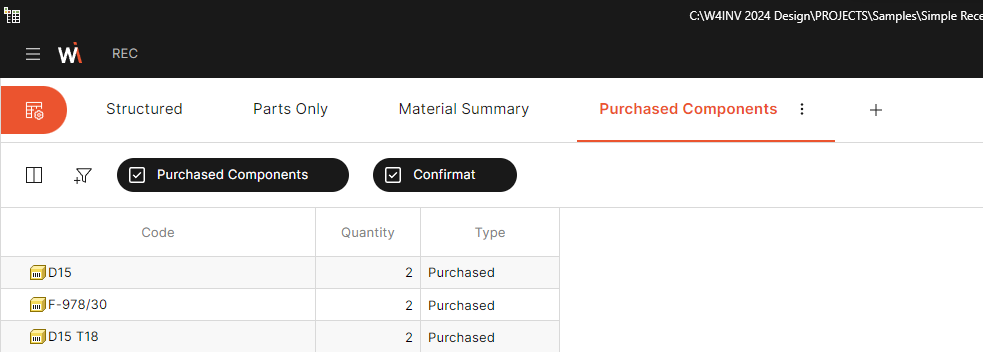
Added filters
3.The filter can be enabled or disabled by ticking or unsticking the check boxes. This controls the final image.
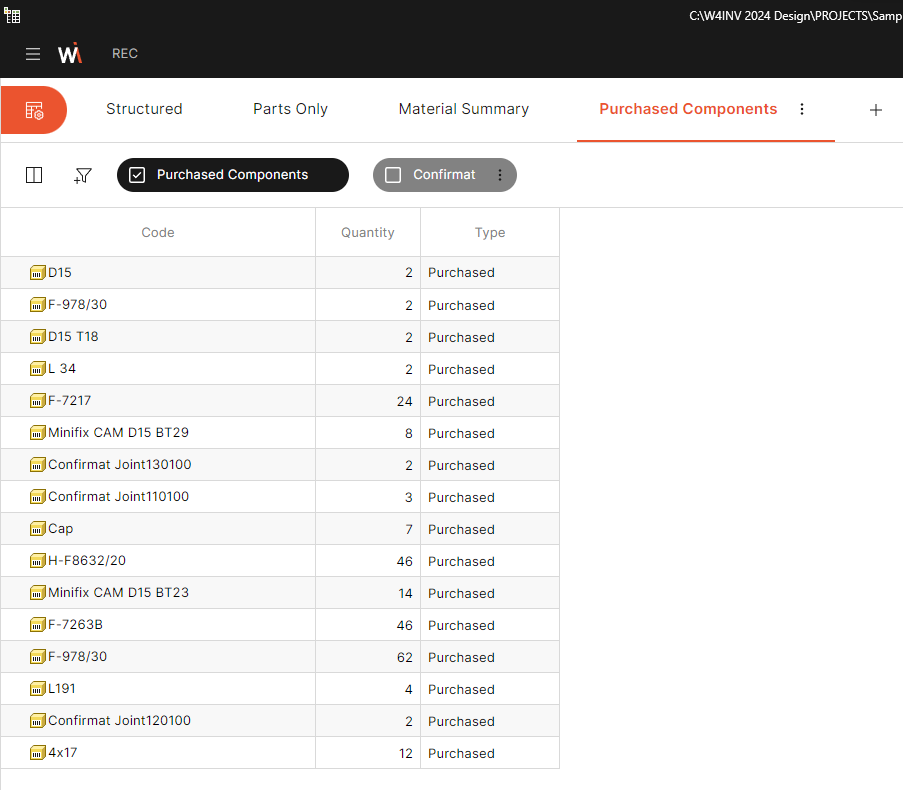 Purchased components enabled, confirmats disabled |
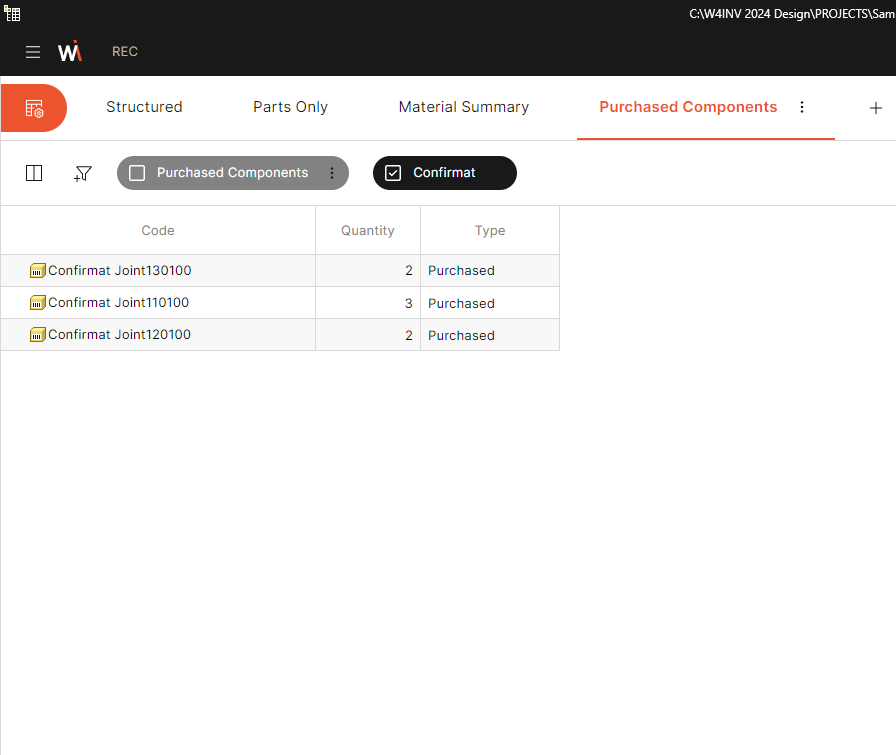 Confirmats enabled, Purchased componets disabled
|