Calling the main BOMapp in one of the above ways opens the main application window, which loads a tree generated from a specific model, a saved .wbom tree or just an empty application, depending on the situation. Below is a full description of the dialogue and the commands visible in the main window.

Main BOMapp window with numbers
Each numbered item and the function descriptions are listed below.
Once the user has generated the BOM and opened it in the BOMapp environment, the path to the opened assembly file is displayed. If the user has opened an already generated .wbom file, then this bar shows the path to the opened file. JoinerCAD users only see the name of the assembly from which the BOM was generated, as Fusion 360 does not have local files. . |
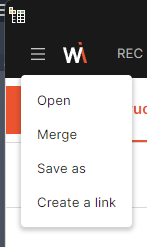
This drop-down menu contains tools for manipulating the generated BOMs: saving, merging or generating a WEB link for a specific BOM. Below are the commands the user can access from this drop-down menu.
|
This is where the name of the assembly from which the BOM was generated is displayed. The system automatically records the data here. If the user wants to change the name, they can do so by hovering the mouse over the name and clicking on the edit button. This modified name will continue to be used when generating the export file/data.
 Static name
 Edit mode for name
|
Clicking this button takes the user to the BOM properties environment where they can fill in the Header information of the BOM. Read more about BOM properties here.
|
This dialogue allows to manage the columns that are visible in a specific tab of the BOM table. Read more about this dialogue here.
|
The tab bar is designed to allow the user to quickly and conveniently browse the generated BOM in different information cross-sections. By default, we provide three information cross-sections that cannot be edited or removed: ▪Structured ▪Parts Only ▪Material Summary
You can read more about these types of BOM here.
The user can create their own additional images by applying various filters. This allows quick and convenient analysis of BOM data. New tabs are created by clicking the "+" sign after the last tab. You can read how to create your own tabs, create and manage filters here.
|
BOMapp has the ability to be controlled by programming tools through an application programming environment (API). If the user wants to create and run their own customised application code that automatically performs certain actions, an API command can be activated in the settings to load and run the programming tools.
|
For convenient and quick management of the most frequently used commands, three commands are provided to perform typical actions: terminate existing connections (Woodwork for Inventor extension only), open Help or run settings dialog.
|
Here, BOMapp users can log in to an account that will allow them to share the generated BOMs online and use or share WEB templates. |
Users can run a search engine that scans and retrieves data based on a given keyword. The search is carried out on a specific tab.
|
This is where the generated BOM is presented to the user and displayed according to the defined criteria (columns). You can read more about the types of BOMs and their representation here.
|
Before exporting to the final selected file, users must specify which template is used for the output. Here, users have to specify the specific template to be used during export. You can read more about the templates here. . |
After the user has specified the specific template to be used for the export, the data is output by clicking on the "Export" button. |
Navigation and context menu via right-click
A right click while hovering over a tree item will call up the context menu. The following actions can be performed:
▪Expand Selected - expands the selected tree branch.
▪Collapse Selected - collapses the selected tree branch.
▪Expand All - expands the whole tree down to the smallest level.
▪Collapse All - collapses the whole tree.
▪Exclude - excludes from the BOM. The menu appears if you are hovering over an assembly or part. Allows the selected component to be excluded from accounting. The component remains in the product data, but is not accounted for in the BOM output. The excluded component and its component parts turn gray.
▪Open in CAD (Autodesk Inventor only) - opens the selected component in Autodesk Inventor. The menu appears if you are hovering over an assembly or part. In case the product is currently open in Autodesk Inventor, the selected component is opened in a separate window..
▪Select (Autodesk Inventor only) - when you click on/select a specific entry in the tree, BOMapp automatically selects and marks the same component in Autodesk Inventor if the product is currently open in Autodesk Inventor. This applies only to assemblies or components.